
Custom Dialog
WebSiteAdmin, September 12, 20232478 Views
Many times, there is a requirement to perform actions based on the user’s input in the Model-driven app. Though there are many ways to do this like, adding a field to the form and getting its response, but as it is a user-interaction process, it is needed to create a “Dialog box” that can be opened with a button click.
To Create a dialog, it is required to import the below solutions in the PowerApps:
- Ribbon Workbench.
- Smart buttons for Ribbon Workbench.
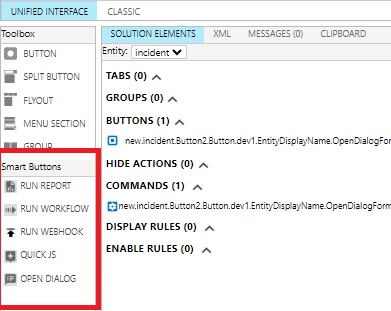
Once both the Solutions are imported to the environment, the below “Smart Buttons” will be visible in the Ribbon Workbench.
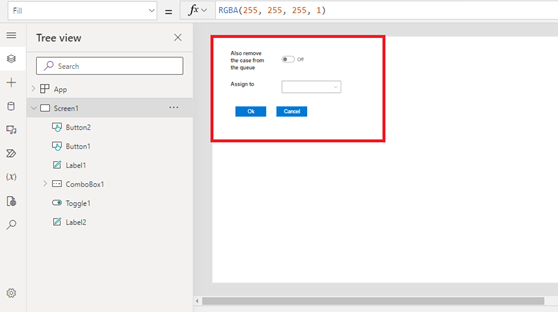
Now, to create a dialog box, we need to create a “Custom Page” and ADD it to the Model-Driven App. Please note that it is required to add the “Custom Page” to the Model-Driven App in which the “Smart button” will be used.
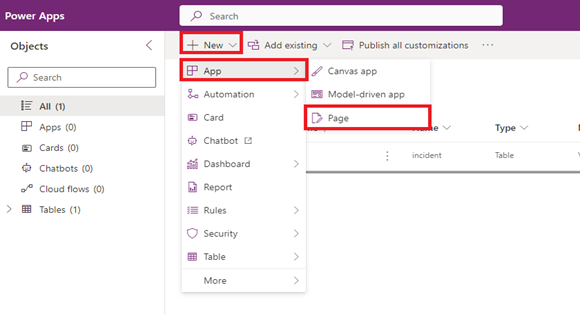
To Create a Custom Page:
- Go to the Solution.
- Add a new “Page”.
To add Custom page to the Model Driven App:
- In the Solution, Open the Model-Driven App Editor.
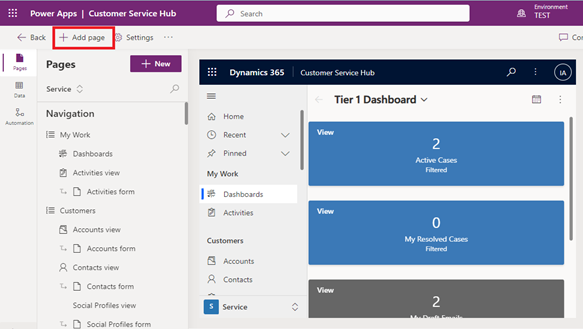
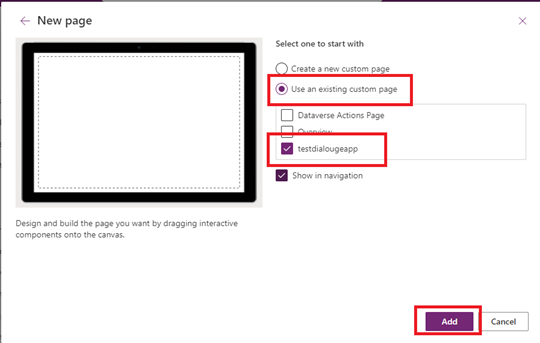
- Click on the “Add Page” and select “Custom Page”.
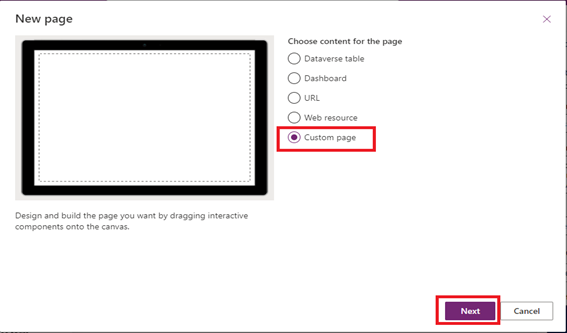
- Click on “Use an existing custom page” and select your “Page”. Once done, click on ‘ADD’.
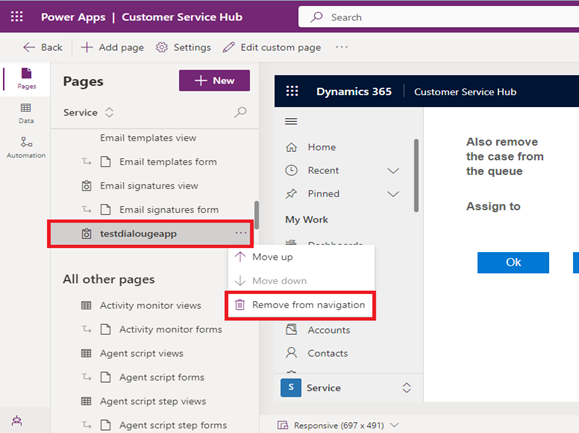
- Once a custom page is added to the app. You can remove the same from Navigation.
Once the Page is created and changes are published, Open the Ribbon Workbench.
After the entity ribbon is opened, drag the “Open Dialog” smart button and add it to the ribbon. Once the button is placed. Below are the required parameters.
- Title: The name of the button to be displayed in the Model-Driven App.
- Dialog URL: Enter the unique name of the custom
- Width: Width of the dialog box.
- Height: Height of the dialog box.
- Dialog Title: Title of the dialog box, which will be displayed on the top of the dialog.
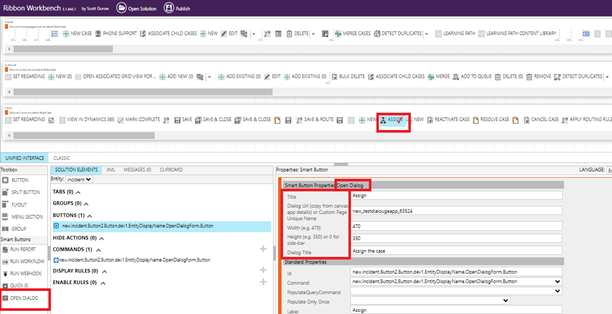
After adding all the parameters, publish the ribbon.
Now, we can get the user’s input from the fields and the parameters like record Id, logged-In user details, etc.
After getting all the parameters, we can pass all the input parameters from the “Page” to the “Power Automate flow” to perform further actions on the entity record based on the user’s input.
This is how on the click of Ribbon Button in Dynamics CRM, based on User input we can call the process to achieve the requirement.
ATM Inspection PowerApp to ease ATM inspection and report generation process.
https://www.inkeysolutions.com/microsoft-power-platform/power-app/atm-inspection
Insert data into Many-to-Many relationship in Dynamics CRM very easily & quickly, using the Drag and drop listbox.
http://www.inkeysolutions.com/what-we-do/dynamicscrmaddons/drag-and-drop-listbox
Comply your Lead, Contact, and User entities of D365 CRM with GDPR compliance using the GDPR add-on.
https://www.inkeysolutions.com/microsoft-dynamics-365/dynamicscrmaddons/gdpr
Create a personal / system view in Dynamics CRM with all the fields on the form/s which you select for a particular entity using the View Creator.
http://www.inkeysolutions.com/what-we-do/dynamicscrmaddons/view-creator