
Side Pane in Model Driven App – Part1
WebSiteAdmin, November 28, 20231984 Views
There are some scenarios where users spend a lot of time in getting the overview of quick updates due to lack of understanding on where to navigate for accessing the respective dashboards, list, records, etc in the model-driven app. PowerApps has provided an efficient way to reduce this gap and users can comfortably access the functionalities in a quick and easier ways and this is how the side panels were introduced. I am starting with the first part of the blog and would provide the details on embedding different components in the side pane step by step.
In this blog we will understand on how to display the canvas app in the side pane inside the model driven app in detail below. The canvas app can be showcased in a side pane through the HTML web-resource and below are the steps to embed the canvas app:
- Get the weblink of the canvas app
- Create a HTML web-resource
- Create a JavaScript to embed the HTML into the side pane
- Export the solution
- Add event handler in the customizations.xml file
- Create a Zip File
- Import back the solution
Get the weblink of the canvas app
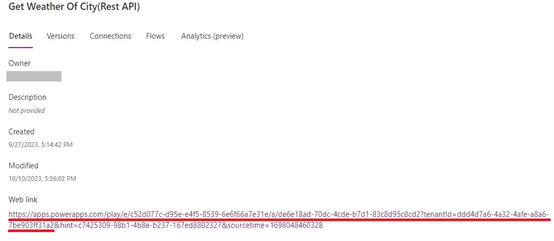
Select the canvas app that are about to display in the side pane and click on the details as below: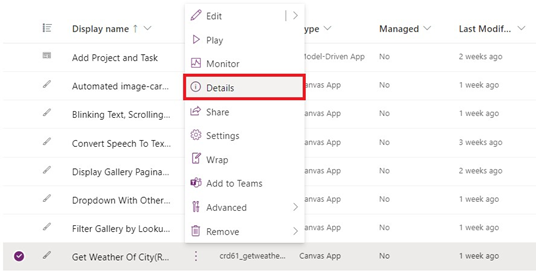 Copy the weblink of the canvas app as highlighted below
Create a HTML web-resource
Create a new HTML file with the below code in it:
<html>
<head>
<meta>
</head>
<body style="overflow-wrap: break-word;" onfocusout="parent.setEmailRange();">
<iframe src=
"https://apps.powerapps.com/play/e/c52d077c-d95e-e4f5-8539-6e6f66a7e31e/a/de6e18ad-70dc-4cde-b7d1-83c8d95c8cd2?tenantId=ddd4d7a6-4a32-4afe-a8a6-7be903ff31a2"
title="description" width="600" >
</iframe>
</body>
</html>
Create a JavaScript to embed the HTML into the side pane
Create a new JavaScript file and add the below code into it:
Sidepane: function (executionContext) {
        Xrm.App.sidePanes.createPane({
            title: "Web Resource",
            hideHeader: true,
            canClose: true,
            width: 650
        }).then((pane) => {
            pane.navigate({
                pageType: "webresource",
                webresourceName: "cared_HTML_Canvas-App"
            })
        });
    },
Export the Solution
- Add the model-driven app into a solution, where you want to show a canvas app.
- Export the solution as unmanaged solution. you must keep the same version of the solution as the previous version.
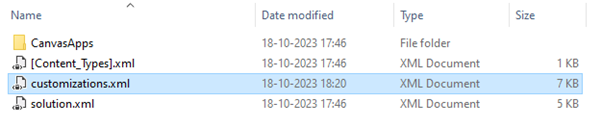
- Unzip the exported solution.
Open the customizations.xml file in edit mode.
Add event handler in the customizations.xml file same as below page
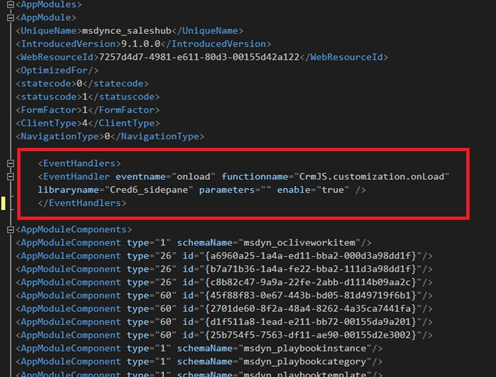
Code:
<EventHandlers>
<EventHandler eventname="onload" functionname="JavaScript function"
libraryname="JavaScript Webresource name" parameters="" enable="true" />
</EventHandlers>
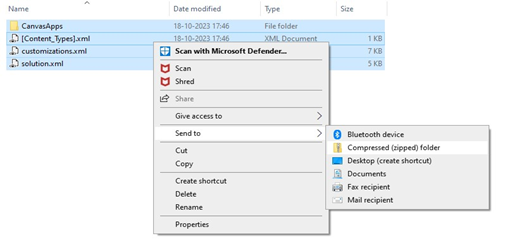
Create a Zip File
Import the Zip File into your Environment & Refresh the page
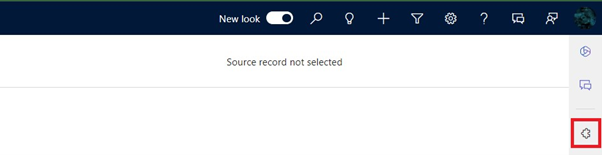
Click on the side pane icon as highlighted here:
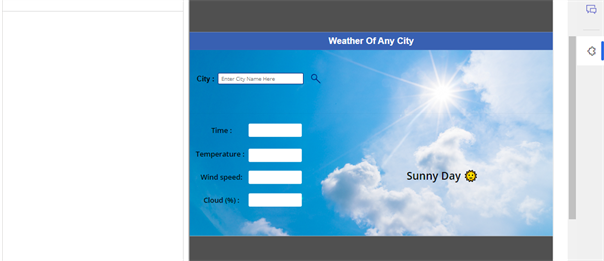
You can see that the canvas app gets loaded into the side pane as below:
I hope this blog has given some idea on how we can use the side pane in the model driven app for faster navigations. In the next part of the blog, I will explain how to embed the entity list, entity record, dashboard and search functionality in the side pane of the model driven app.
Stay tuned for more exciting PowerApps features!!
ATM Inspection PowerApp to ease ATM inspection and report generation process.
https://www.inkeysolutions.com/microsoft-power-platform/power-app/atm-inspection
Insert data into Many-to-Many relationship in Dynamics CRM very easily & quickly, using the Drag and drop listbox.
http://www.inkeysolutions.com/what-we-do/dynamicscrmaddons/drag-and-drop-listbox
Comply your Lead, Contact, and User entities of D365 CRM with GDPR compliance using the GDPR add-on.
https://www.inkeysolutions.com/microsoft-dynamics-365/dynamicscrmaddons/gdpr
Create a personal / system view in Dynamics CRM with all the fields on the form/s which you select for a particular entity using the View Creator.
http://www.inkeysolutions.com/what-we-do/dynamicscrmaddons/view-creator