
Add custom fonts in SSRS Report
WebSiteAdmin, February 13, 20243103 Views
Adding custom fonts in SSRS or SQL Server Reporting Services is a powerful way to personalize and enhance the visual appeal of your reports. This process involves selecting a distinct typeface that aligns with your brand identity and integrating it seamlessly into your SSRS environment. Let’s explore how the addition of a custom font can elevate the impact of your SSRS reports.
Here’s a step-by-step guide on how to add a custom font:
Download the font files.
- Download .otf / .ttf files as SSRS fully supports True Type Fonts (ttf) and has limited support for Open Type Fonts (otf).
- Essentially, any Font that can be instantiated by the .NET System.drawing.font class is supported by SSRS.
Install the font in your machine.
- Make sure the custom font is installed on the server where SSRS is running. This ensures that the font is available for rendering reports.
Configure and define fonts in reports.
- In Visual Studio or Report Builder, open your SSRS report project. (If it is already open then you need to close it and reopen it to use new fonts.)
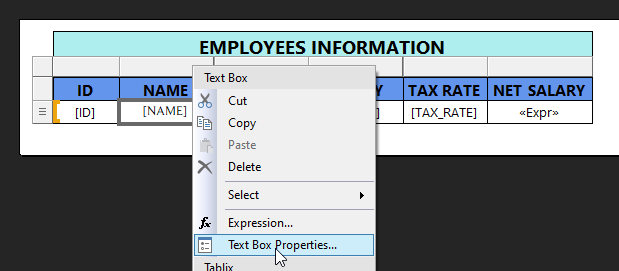
- Select the textbox or other report element where you want to use the custom font.
- In the Properties window, find the “Font” property.

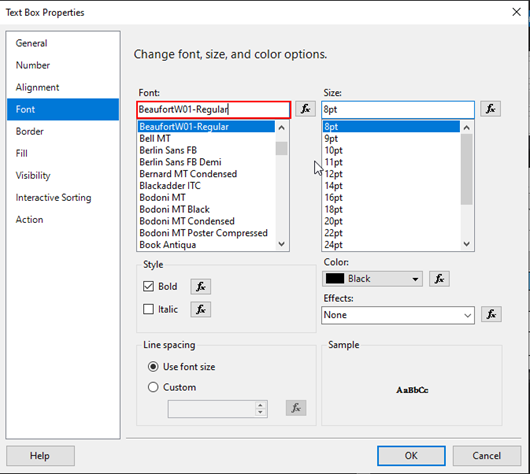
Specify Custom fonts.
- In the Font dialog, select the custom font from the drop-down list.
- You may need to set other properties like size, style, and weight as needed.
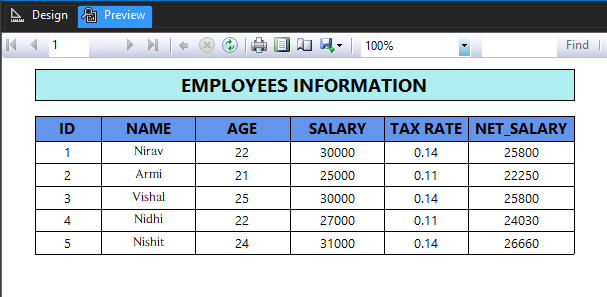
Deploy and test.
- Deploy your SSRS report to the Report Server.
- Test the report to ensure that the custom font is rendering correctly
Keep in mind that the custom font must be available on the server to avoid rendering issues. If the font is not installed on the server, you may encounter problems when viewing or exporting the report.
Additionally, if you are using a web browser to view the reports, ensure that the font is also available on the client machine, as some browsers may try to use local fonts for rendering.
So this is how we can use custom fonts in SSRS.
Know the number of records in any Dataverse entity or table.
https://www.inkeysolutions.com/entity-record-counter
ATM Inspection PowerApp to ease ATM inspection and report generation process.
https://www.inkeysolutions.com/microsoft-power-platform/power-app/atm-inspection
Insert data into Many-to-Many relationship in Dynamics CRM very easily & quickly, using the Drag and drop listbox.
http://www.inkeysolutions.com/what-we-do/dynamicscrmaddons/drag-and-drop-listbox
Comply your Lead, Contact, and User entities of D365 CRM with GDPR compliance using the GDPR add-on.
https://www.inkeysolutions.com/microsoft-dynamics-365/dynamicscrmaddons/gdpr
Create a personal / system view in Dynamics CRM with all the fields on the form/s which you select for a particular entity using the View Creator.
http://www.inkeysolutions.com/what-we-do/dynamicscrmaddons/view-creator