
Delaying Pipeline Execution Until a Specific Time in Fabric Data Pipeline by Implementing a Dynamic Wait Mechanism
Inkey Solutions, March 13, 2025139 Views
In Azure Data Factory (ADF), certain pipelines need to run at a specific time, but standard scheduling mechanisms like triggers or on-completion dependencies may not be suitable due to dependencies on upstream processes. A common challenge is ensuring that a pipeline starts at or after a predefined time while avoiding issues like premature execution, data unavailability, or conflicts with parallel running processes.
For instance, a pipeline may need to process data that is uploaded daily at a fixed time (e.g., 2:55 PM). The pipeline must not run before the data is available and should not interfere with upstream processes that may still be running. The goal is to introduce a controlled delay mechanism that ensures execution only when the required conditions are met.
Requirement
- The pipeline should start at or after a specific time (e.g., 3 PM).
- It must not run before the data is available to avoid processing incomplete or incorrect information.
- It should not execute in parallel with ongoing upstream processes to prevent conflicts, deadlocks, or resource contention.
Why Not Use a Trigger or On-Completion?
- Trigger Issue: A time-based trigger (e.g., scheduled at 3 PM) can lead to execution conflicts if upstream processes take longer than expected to complete. This parallel execution with ongoing upstream processes may result in deadlocks, resource conflicts, or failures, impacting pipeline stability.
- On-Completion Issue: If a pipeline is triggered upon completion of upstream processes, it might start too early, before the required data is available.
Solution: Implementing a Wait Logic in ADF
To handle this, we use Set Variable and Wait activities to dynamically delay execution:
- Capture the current UTC time and convert it to the target time zone.
- Calculate the remaining time until the desired execution time.
- Use a Wait activity to pause execution until the target time is reached.
Step-by-Step Implementation
Step 1: Create a Data Pipeline
- Go to Data Engineering in Microsoft Fabric.
- Create a new pipeline and name it ConditionalWaitPipeline.

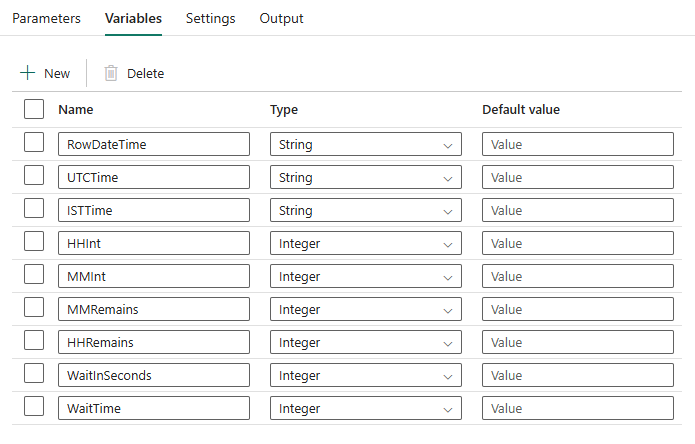
Step 2: Define Variables
In the Pipeline Settings, create the following variables:
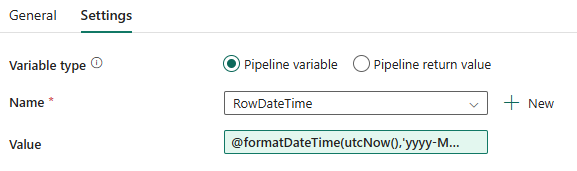
Step 3: Set Current Timestamp (RowDateTime)
- Add a Set Variable activity.
- Name it RowDateTime.
- Set variableName to RowDateTime.
- Set value to:
@formatDateTime(utcNow(),‘yyyy-MM-dd HH:mm:ss.fff’)
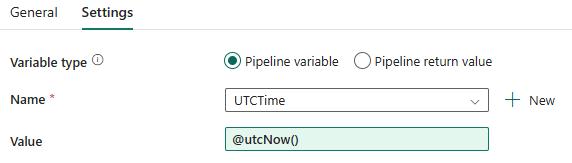
Step 4: Capture UTC Time (UTCTime)
- Add another Set Variable activity.
- Name it UTCTime.
- Set variableName to UTCTime.
- Set value to:
@utcNow()
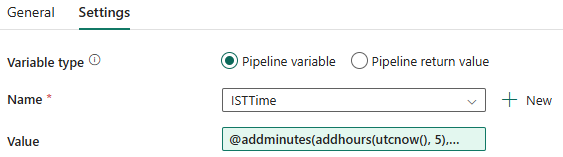
Step 5: Convert UTC to IST (ISTTime)
- Add another Set Variable activity.
- Name it ISTTime.
- Set variableName to ISTTime.
- Set value to:
@addminutes(addhours(utcnow(), 5), 30)
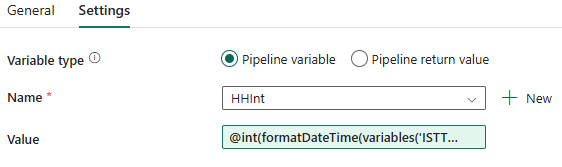
Step 6: Extract Hour (HHInt)
- Add another Set Variable activity.
- Name it HHInt.
- Set variableName to HHInt.
- Set value to:
@int(formatDateTime(variables(‘ISTTime’), ‘HH’))
Step 7: Extract Minute (MMInt)
- Add another Set Variable activity.
- Name it MMInt.
- Set variableName to MMInt.
- Set value to:
@int(formatDateTime(variables(‘ISTTime’), ‘mm’))

Step 8: Add If Condition to Compare Time
- Add an If Condition activity.
- Name it If Condition.
- Set Expression to:
@greaterOrEquals(
ticks(convertTimeZone(utcnow(), ‘UTC’, ‘India Standard Time’)),
ticks(formatDateTime(
concat(formatDateTime(variables(‘RowDateTime’), ‘yyyy-MM-dd’), ‘T15:00:00’),
‘yyyy-MM-ddTHH:mm:ss’
))
)
Step 9: Configure If Condition – False Path (Wait Calculation)
If the current time is before 3:00 PM IST, calculate the waiting time:
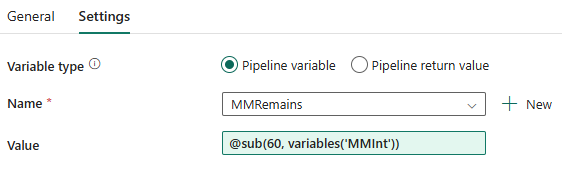
Step 9.1: Calculate Minutes Remaining (MMRemains)
- Add a Set Variable activity.
- Name it MMRemains.
- Set variableName to MMRemains.
- Set value to:
@sub(60, variables(‘MMInt’))
Step 9.2: Calculate Hours Remaining (HHRemains)
- Add another Set Variable activity.
- Name it HHRemains.
- Set variableName to HHRemains.
- Set value to:
@sub(14, variables(‘HHInt’))
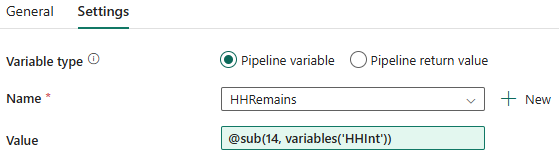
Note: We use 14 because we are calculating the remaining hours until 3:00 PM IST. If the target time were 4:00 PM, we would use 15 instead. The logic ensures that we account for both hours and the remaining minutes separately.
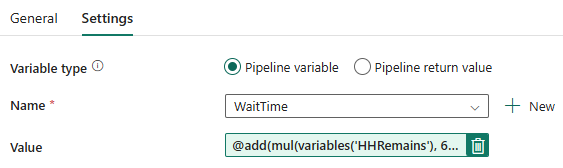
Step 9.3: Calculate Total Wait Time (WaitTime)
- Add another Set Variable activity.
- Name it WaitTimeMM.
- Set variableName to WaitTime.
- Set value to:
@add(mul(variables(‘HHRemains’), 60), variables(‘MMRemains’))
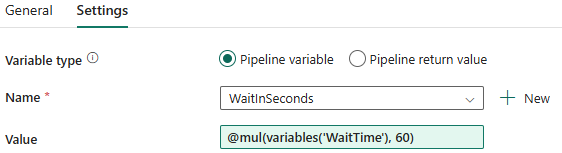
Step 9.4: Convert Wait Time to Seconds (WaitInSeconds)
- Add another Set Variable activity.
- Name it WaitInSeconds.
- Set variableName to WaitInSeconds.
- Set value to:
@mul(variables(‘WaitTime’), 60)
Step 9.5: Add Wait Activity
- Add a Wait activity.
- Name it Wait Till 3PM IST.
- Set waitTimeInSeconds to:
@variables(‘WaitInSeconds’)

Step 9.6: Add Invoke Pipeline Activity
After the Wait activity, add an Invoke Pipeline activity to trigger the required pipeline once the wait time has elapsed.
Step 10: Configure If Condition – True Path (Proceed Immediately)
If the current time is past 3:00 PM IST, add an Invoke Pipeline activity to proceed without any delay.
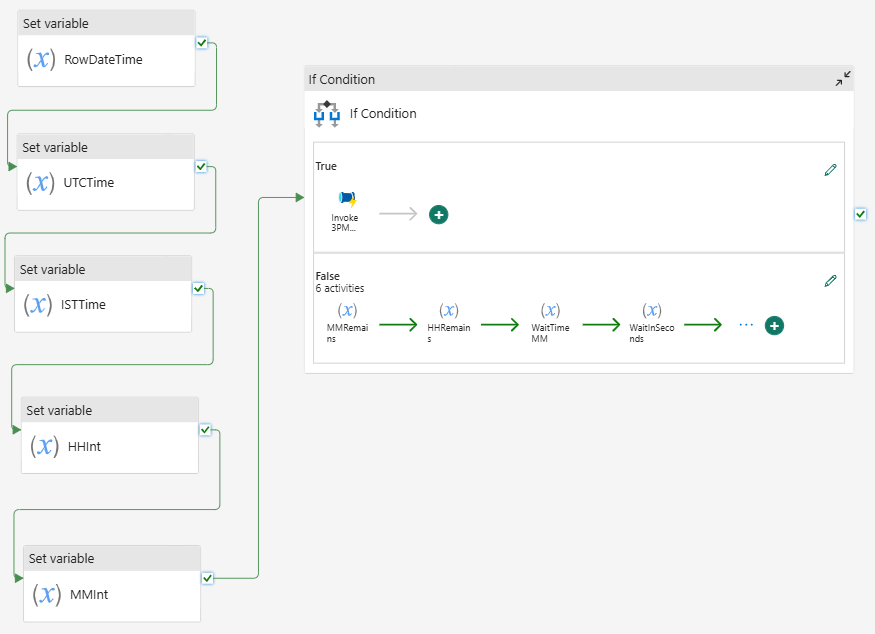
Final Pipeline Overview
Here is the complete pipeline view with all steps configured:
Use Cases
This approach can be used when:
- Upstream processes take an unpredictable amount of time to complete.
- A process must start at a specific time, but only if previous dependencies are met.
- You want to avoid failures due to fixed scheduling when dependencies are delayed.
Conclusion
This approach ensures that the pipeline runs at the right time without interfering with upstream processes or causing execution failures due to incorrect timing. It dynamically calculates the waiting time and ensures