
How to Create Progress Indicator in Business Central using AL Code
WebSiteAdmin, December 12, 20232972 Views
If you want to know how to create a progress indicator in Business Central using AL Code, look no further. This blog will teach you how.
A progress indicator is a useful feature that lets the user know how much of a long-running process has been completed and how much is left. A progress indicator can also display a percentage value and a progress bar to visualize the progress.
So, lets jump right in starting with prerequisites.
Prerequisites
- Access to a Dynamics 365 Business Central instance.
- Basic knowledge of AL (Application Language) code.
- Visual Studio Code with AL Language extension installed.
Requirement
When there is a process in Business Central that takes too long to execute you can add a process indicator to show the user how much of it is left.
Solution (Implementation Steps)
To create a progress indicator, we will use the Dialog data type,

and its methods, such as Open,

Update,

The Dialog data type allows us to create dialog windows that can display text and variables and update them dynamically. We will also use the Sleep function to simulate some processing time.
The basic steps to create a progress indicator are:
- Declare a variable of type Dialog and some other variables to store the text and the progress value.
- Use the Open method to open a dialog window with some text and a variable that will represent the progress value. Use number signs (#) to insert the variable value into the text and use @ characters instead of # characters to display the value as a percentage in a progress bar.
- Use a loop to perform some processing and increment the progress value. Use the Update method to update the dialog window with the new value of the progress variable.
- Use the Close method to close the dialog window when the processing is done.
Here is an example of AL code that implements these steps:
page 50100 INK_Progress_Indicator_Page
{
    Caption = 'Progress Indicator';
    PageType = Card;
    ApplicationArea = All;
    UsageCategory = Administration;

    actions
    {
        area(Processing)
        {
            Action(Progress_Indicator_Action)
            {
                Caption = 'Progress Indicator';
                ApplicationArea = All;
                Image = Process;

                trigger OnAction()
                var
                    Progress: Dialog;
                    Counter: Integer;
                    Progress_Text: Label 'Processing 100 ............ @1';
                begin
                    Counter := 0;
                    Progress.Open(Progress_Text, Counter); //Progress dialog will open

                    repeat
                        //Put your processing code here
                        Counter := Counter + 1;
                        Progress.Update(); //Progress dialog will be updated
                        Sleep(50);
                    until Counter = 0;

                    Progress.Close(); //Progress dialog will be closed
                end;
            }
        }
    }
}
Now, when you click on the action “Progress Indicator” you will see the progress dialog,
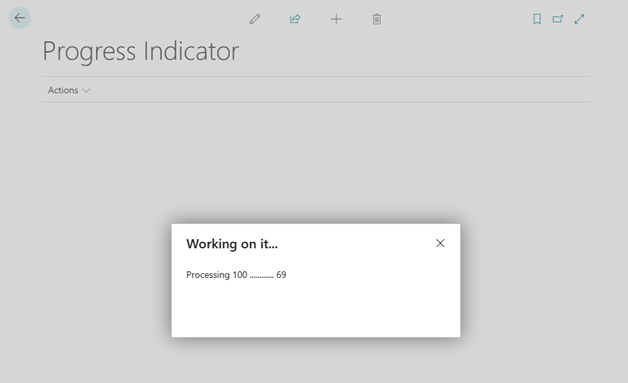
You can customize the text and the variable in the dialog window according to your needs. For example, you can use different labels for different languages, or use different variables for different processes. Also “Counter” variable is an integer so you can choose any number between its range which is -2,147,483,647 to 2,147,483,647.
You can also use the progress dialog on reports.
{
    Caption = 'Progress Indicator Report';
    UsageCategory = Administration;
    ApplicationArea = All;
    ProcessingOnly = true;

    trigger OnPreReport()
    var
    begin
        Clear(Counter);
        if not GuiAllowed then
            exit;
        Progress.Open(Progress_Text); //Progress dialog will open
    end;

    trigger OnPostReport()
    var
    begin
        //Put your processing code here
        for Counter := 1 to 100 do begin
            Progress.Update(1, Counter); //Progress dialog will be updated
            Sleep(50);
        end;
        Progress.Close(); //Progress dialog will be closed
    end;

    var
        Counter: Integer;
        Progress_Text: Label 'Processing 100 ............ #1';
        Progress: Dialog;
}
Now when you run the report progress dialog will show up,
Conclusion
I hope this blog post was helpful for you to learn how to create a progress indicator in Business Central using the Progress dialog. If you have any questions or feedback, please leave a comment below.
ATM Inspection PowerApp to ease ATM inspection and report generation process.
https://www.inkeysolutions.com/microsoft-power-platform/power-app/atm-inspection
Insert data into Many-to-Many relationship in Dynamics CRM very easily & quickly, using the Drag and drop listbox.
http://www.inkeysolutions.com/what-we-do/dynamicscrmaddons/drag-and-drop-listbox
Comply your Lead, Contact, and User entities of D365 CRM with GDPR compliance using the GDPR add-on.
https://www.inkeysolutions.com/microsoft-dynamics-365/dynamicscrmaddons/gdpr
Create a personal / system view in Dynamics CRM with all the fields on the form/s which you select for a particular entity using the View Creator.
http://www.inkeysolutions.com/what-we-do/dynamicscrmaddons/view-creator