
How to Utilize the Accounts Receivable Administrator Role Center in Microsoft Dynamics 365 Business Central
Inkey Solutions, February 28, 2025361 Views
Microsoft Dynamics 365 Business Central offers a strong ERP solution adapted to streamline financial operations. One of the standout features of 2024 wave1 for collection management is the Accounts Receivable Administrator Role Center. This role center is designed to centralize and simplify collection tasks, such as creating and sending reminders and statements. By leveraging the updated features of this role center, collection managers can efficiently track and manage outstanding balances, ultimately improving financial oversight and reducing administrative workload.
Business Value
The Accounts Receivable Administrator Role Center delivers significant value by providing a consolidated view of essential financial metrics. With features like wide cues and updated menus, it allows collection managers to swiftly validate and reconcile account receivables. This streamlining of data access helps reduce the time spent searching for critical information, minimizes errors, and enhances the ability to manage collections effectively. The role center ensures that collection teams can focus on resolving issues and maintaining cash flow, rather than getting bogged down in administrative tasks.
Requirement
How to set up and utilize the Accounts Receivable Administrator Role Center in Business Central?
Prerequisites
- Ensure your organization has valid licenses for Microsoft Dynamics 365 Business Central.
- Confirm that users assigned to this role have the necessary permissions to access and manage accounts receivable data.
Solution (Implementation Steps)
To effectively use the Accounts Receivable Administrator Role Center, follow these steps:
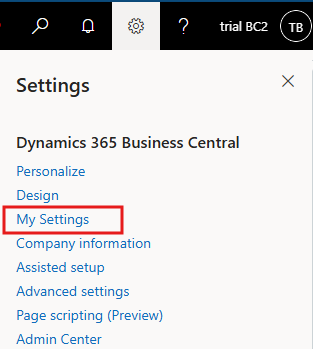
- To access the Accounts Receivable Administrator Role Center, the user needs to click on the gear icon in the top right corner and select the “My Settings” option.
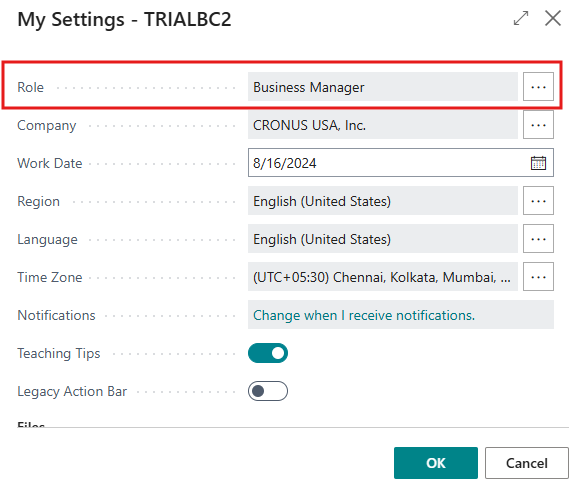
- In the Role field, click on three dots to select role center.
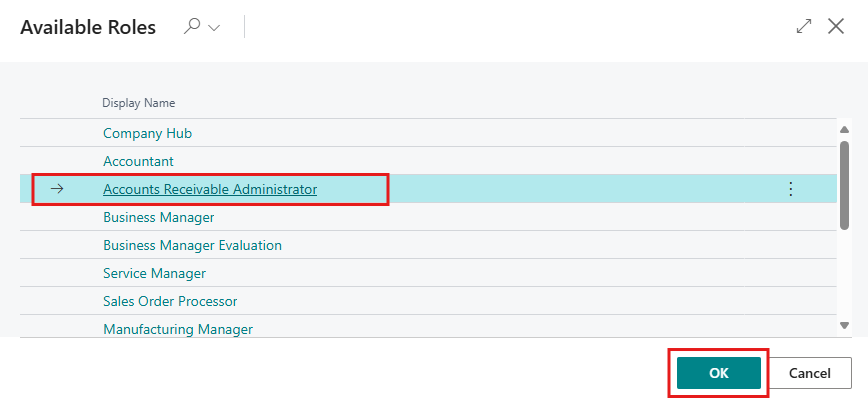
- The list of role centers page will open; from that list, the user needs to select Accounts Receivable Administrator and Click on OK button. The Accounts Receivable Administrator Role Center Page will open.
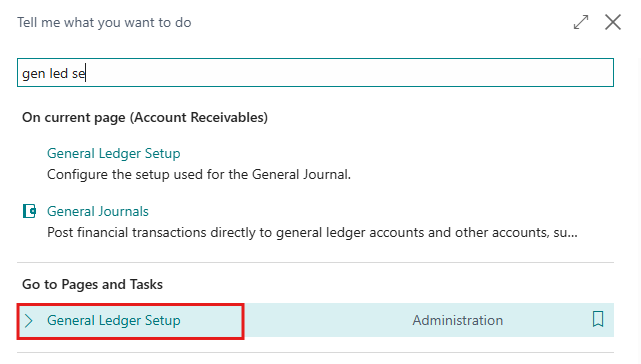
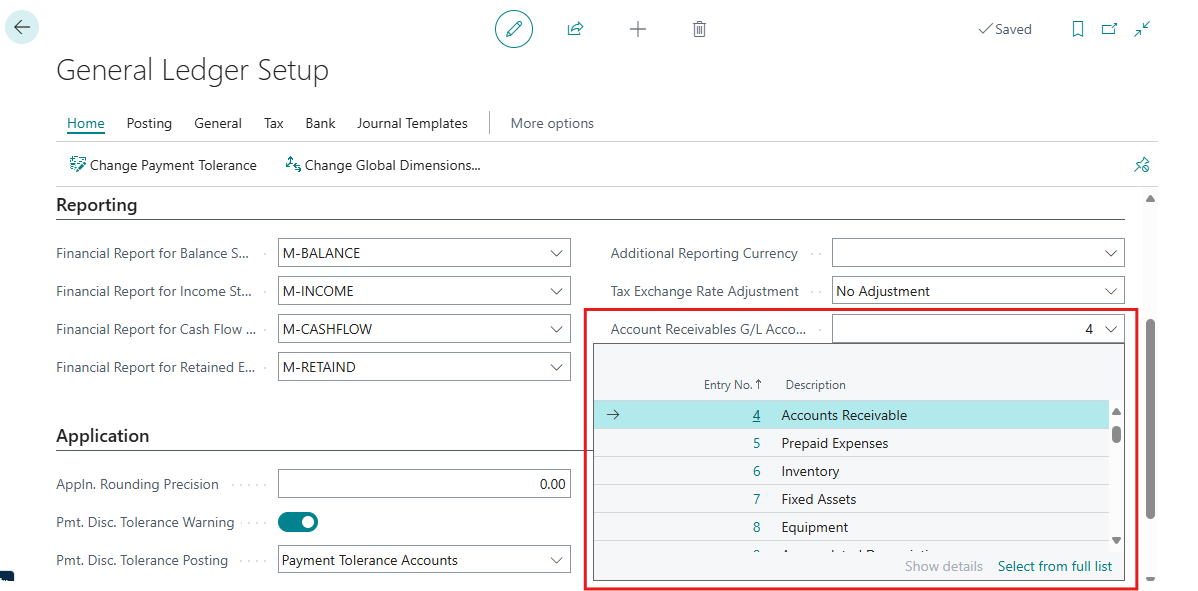
- Now, the user needs to go to the General Ledger Setup page by clicking on the Tell Me search icon.
- In the Account Receivables G/L Account Category field, users need to select the category that represents their accounts receivable. For example, in a US demo company, this might be category ‘4‘, but it could differ based on your company’s specific setup or customizations.
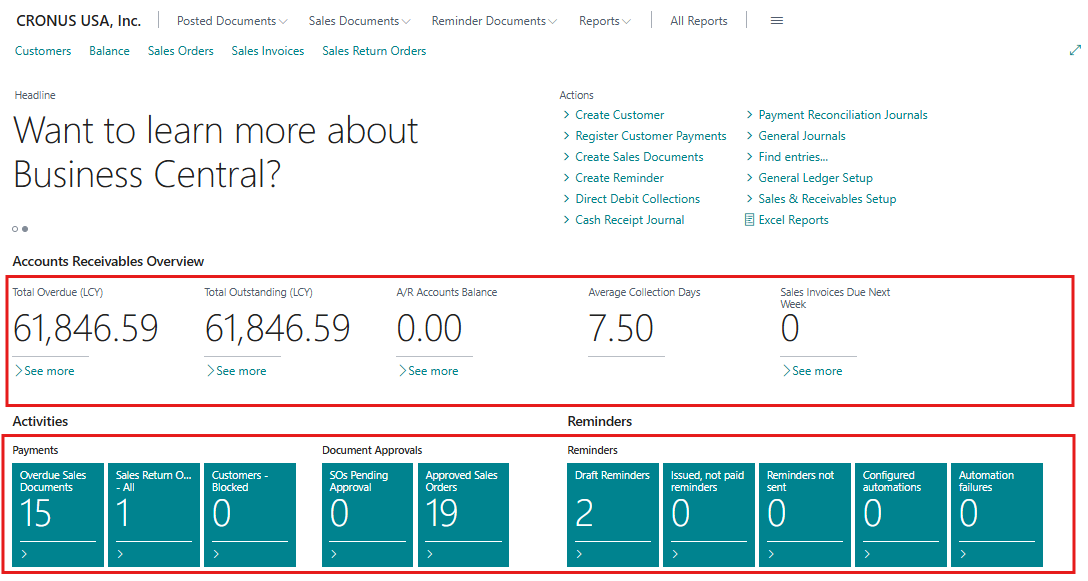
- Now User can see company’s all the overdue & Receivable details on the role center page as given below screen shot.
NOTE:
If users do not use account categories or post directly to accounts receivables accounts, the A/R Accounts Balance cue may not be relevant. If the user wants, the user can personalize the role center to hide it.
Conclusion
Utilizing the Accounts Receivable Administrator Role Center in Microsoft Dynamics 365 Business Central streamlines the management of collection tasks and provides valuable insights into outstanding balances. By configuring and personalizing the role center, collection managers can enhance their operational efficiency, reduce manual errors, and ensure a more effective collections process. This setup not only saves time but also supports better financial management and improved cash flow, contributing to the overall productivity and financial health of your organization.