
Performing CRUD Operations in Power Apps using any Data Source – Part V
WebSiteAdmin, August 19, 20232161 Views
In the previous 4 blog parts, we have shown what data source we are using, Data Model View, how to connect to any data source in Power Apps, how to read data from any Data source, how to create records using the Patch method for column of any data type, how to update existing records from any Data source, and deleting a record from Data Source. You can check the forth part here.
In this blog, we will be showing how to perform all the CRUD operations using Forms. Basically we are going to explain in two points :
- Screen Setup for CRUD Operations.
- Performing CRUD operations using Forms.
Screen Setup for CRUD Operations
In this method we’re using “scr_View” to view our records and then we have created 2 more screens, “CreateScreen” and “DetailsScreen”, respectively. [Note: we have shown the creation of the ‘scr_View’ in Blog Part II of this 5-part blog series]
- Create a new screen and rename it to “CreateScreen”
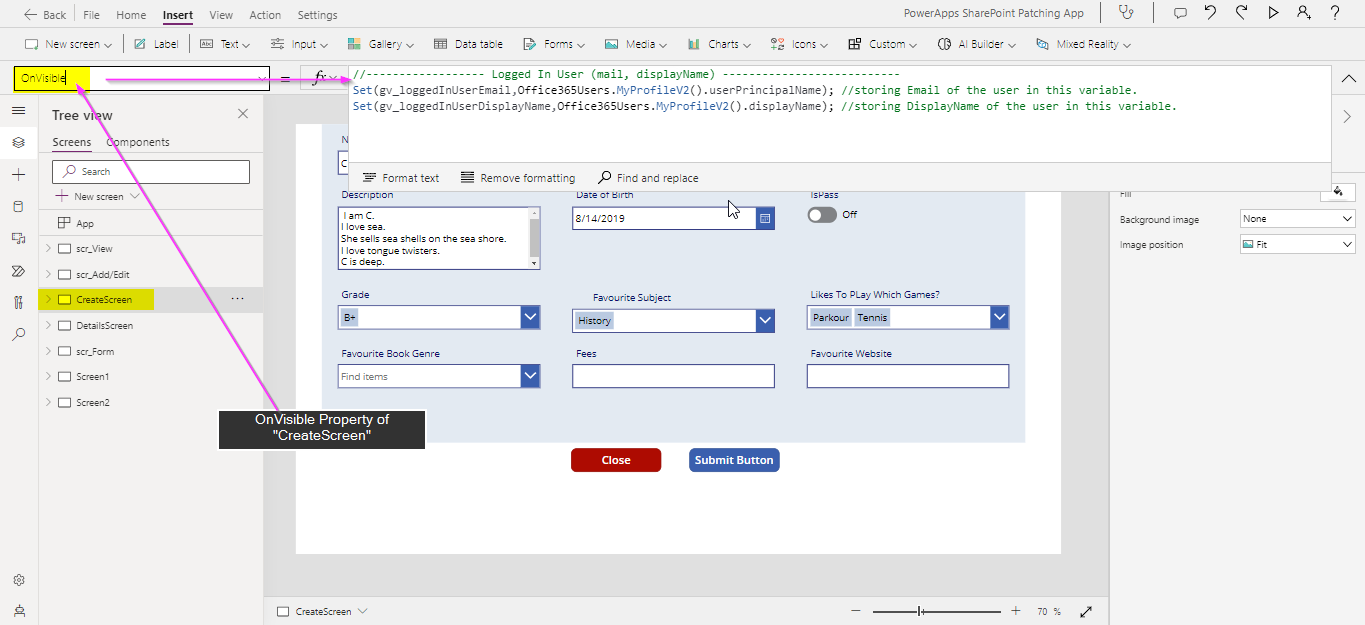
- Update the OnVisible Property of the “CreateScreen” screen with following code:
//—————— Logged In User (mail, displayName) —————————
Set(gv_loggedInUserEmail,Office365Users.MyProfileV2().userPrincipalName); //storing Email of the user in this variable.
Set(gv_loggedInUserDisplayName,Office365Users.MyProfileV2().displayName); //storing DisplayName of the user in this variable.
- Add an input control, “Edit form” on the screen, and rename it to “Form_AddEdit”
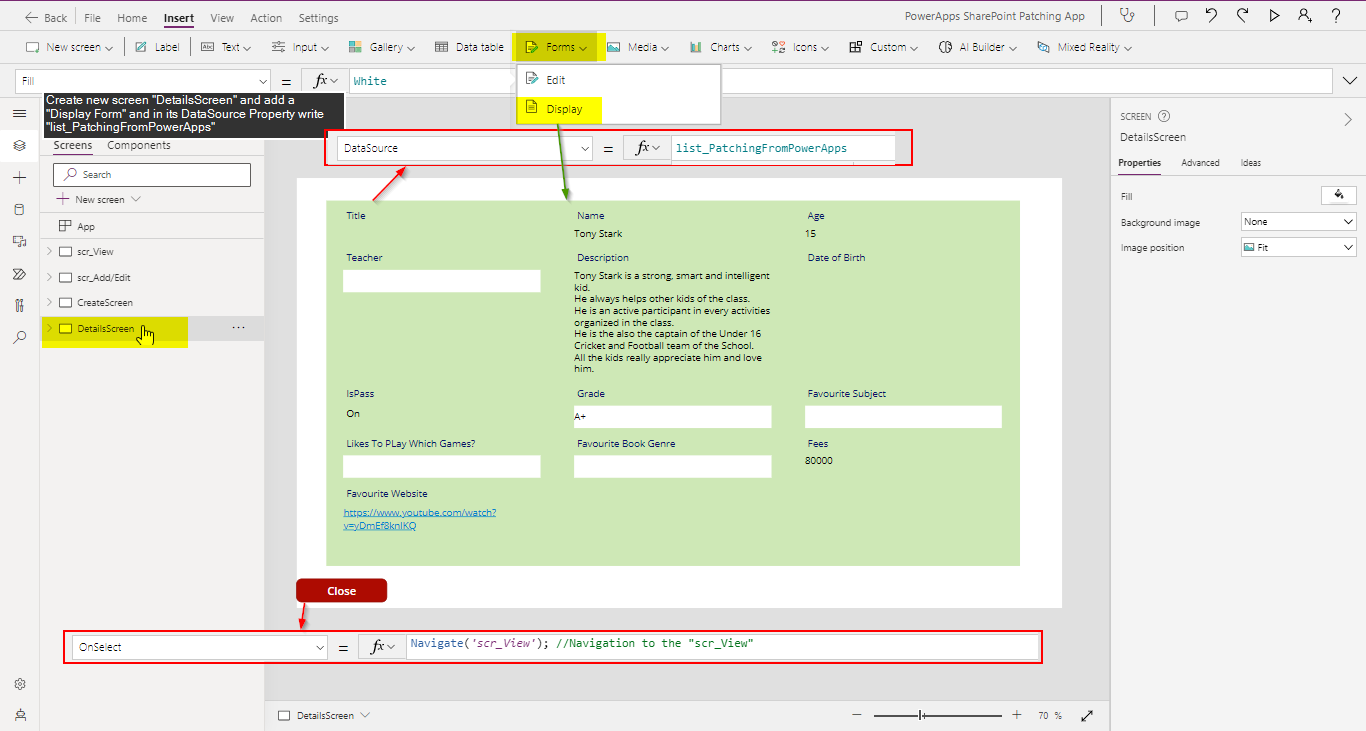
- Set the “DataSource” of the “Form_AddEdit” to SharePoint list “list_PatchingFromPowerApps”
- Set the “Items” property of the “Form_AddEdit” to “gal_ViewOnlyRecords.Selected”
- Add the “Fields” property of the “Form_AddEdit” to the fields which we are working with.
Refer below screenshot.

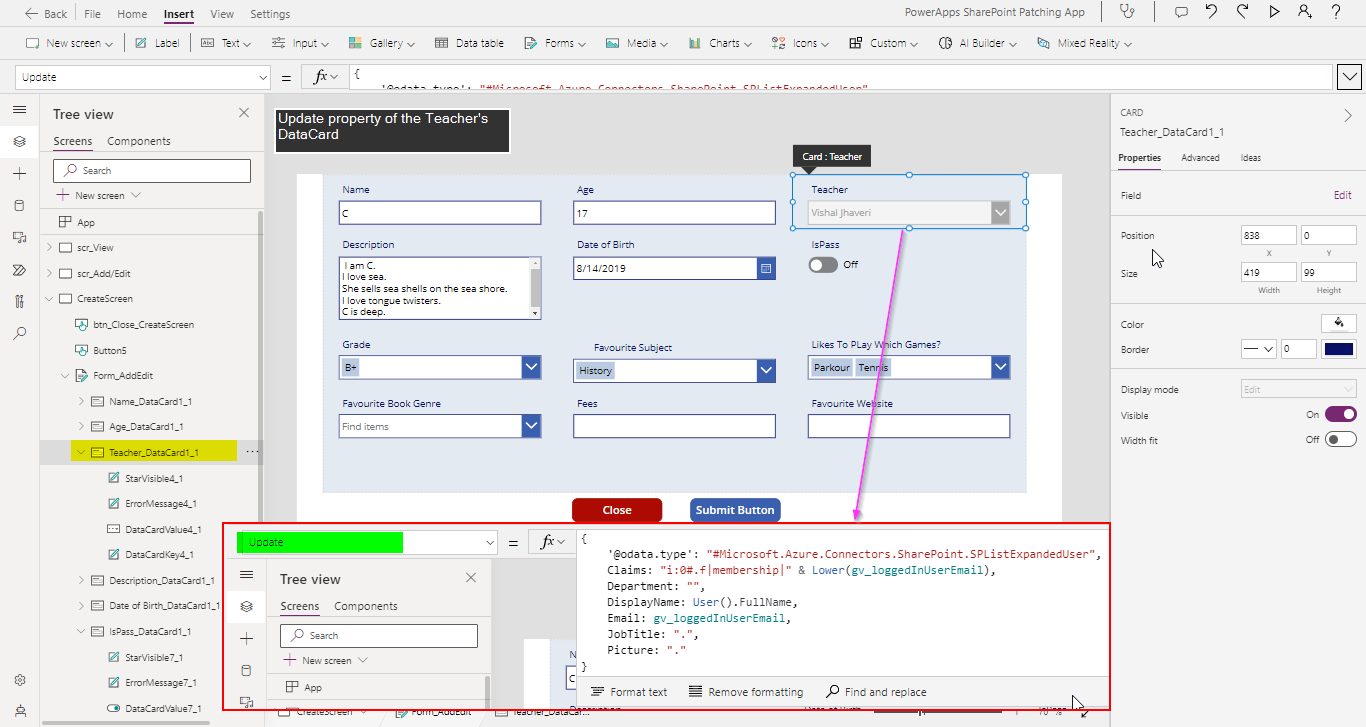
- Do change the “Items” and the “DefaultSelectedItems” property of the Teacher Combo-box of the “Teacher” field as shown in below images and set the DisplayMode property to “Disabled”

- Add button, and rename it to “Close” which should navigate to “scr_View”, i.e., on its OnSelect Property write “Navigate(scr_View)”
- Add button, and rename it to “Submit” and on its OnSelect Property write “SubmitForm(Form_AddEdit)”
- Create a new screen, “DetailsScreen” which will be a View Only Records Values type of Screen.
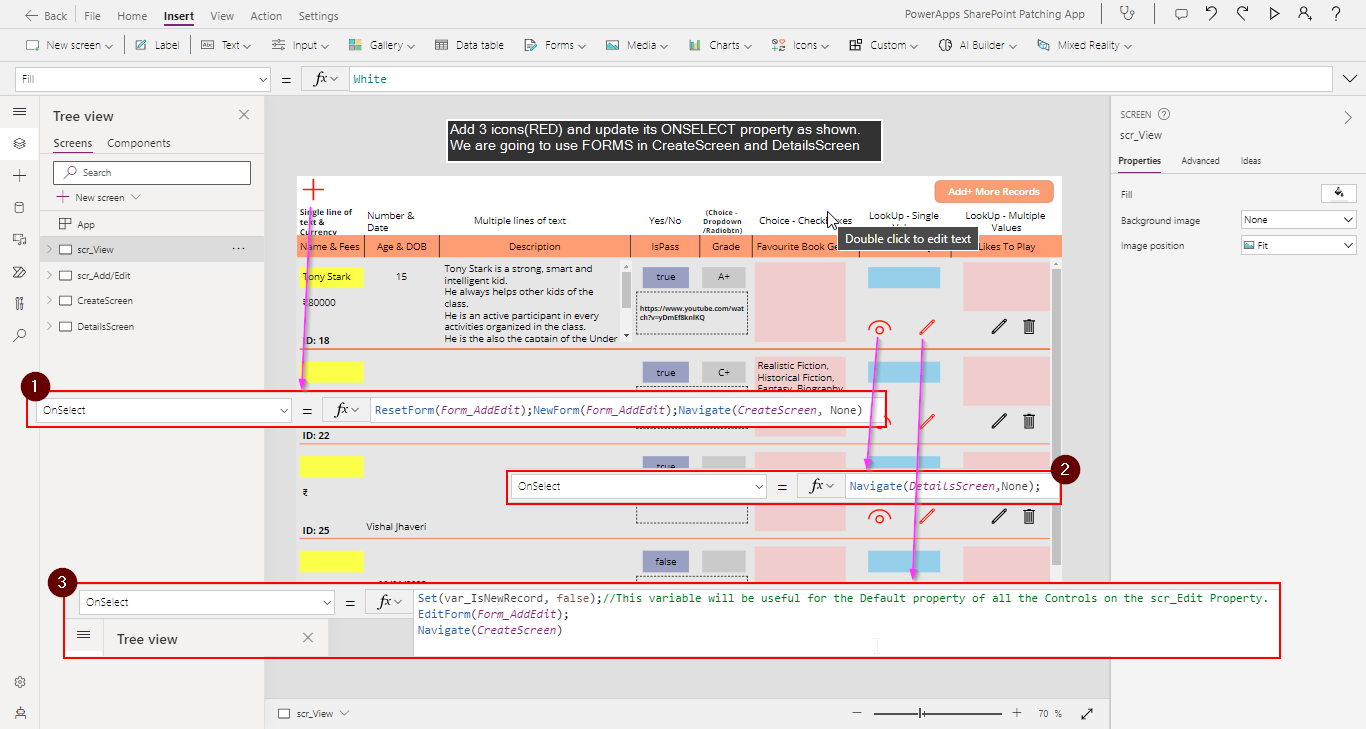
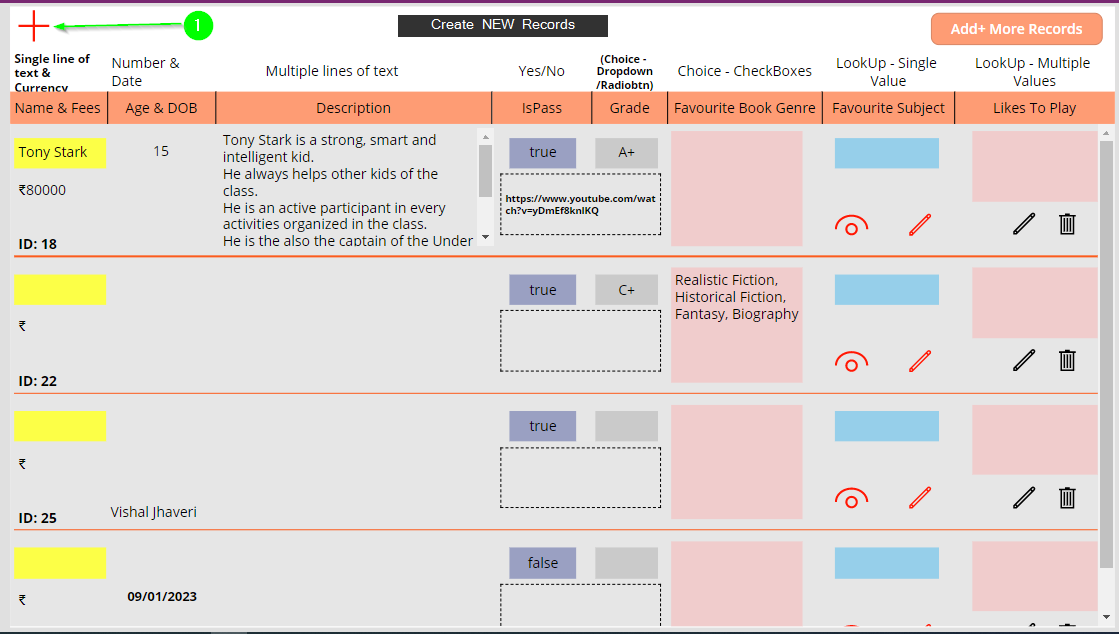
- Make some modifications in the “scr_View” as shown in the image below. The red icons in the image will be used to operate CRUD operations using the FORMS.
+ Icon: To create new records using Forms
Edit Icon: To edit existing records using Forms
Eye Icon: To view the records.
#Explanation
B. Performing CRUD operations using Forms.
Create New Records:
- Press + icon of scr_View.
- You will navigate to “CreateScreen”. Add dummy values in the controls as shown in below image and press the Submit button.
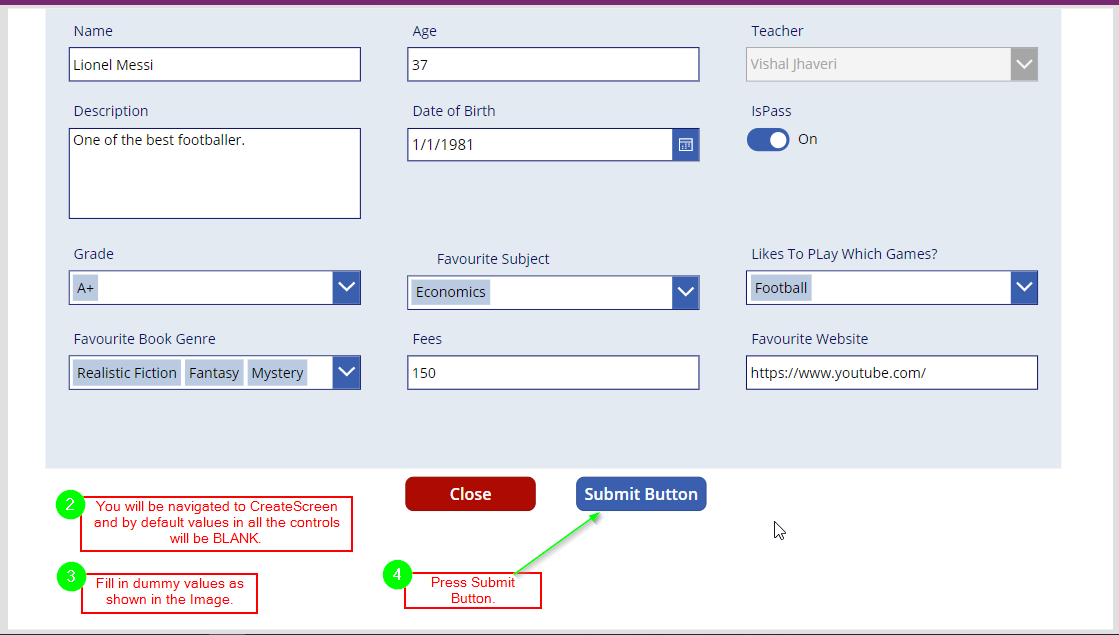
- On pressing the Submit button, you will be navigated back to “scr_View” and you can see your record.

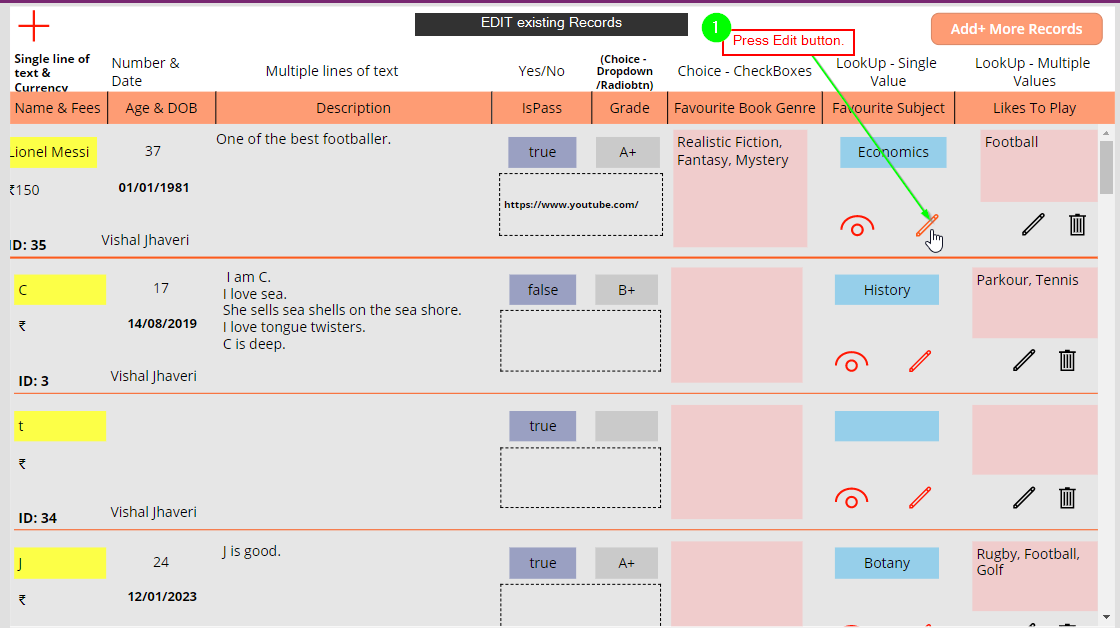
Edit Existing Records:
- Click “Edit” icon. You will be navigated to “CreateScreen” with default pre-filled values in respective controls. (Ignore other data in gallery)

- Edit some values of the controls as shown in the image and press the Submit button.
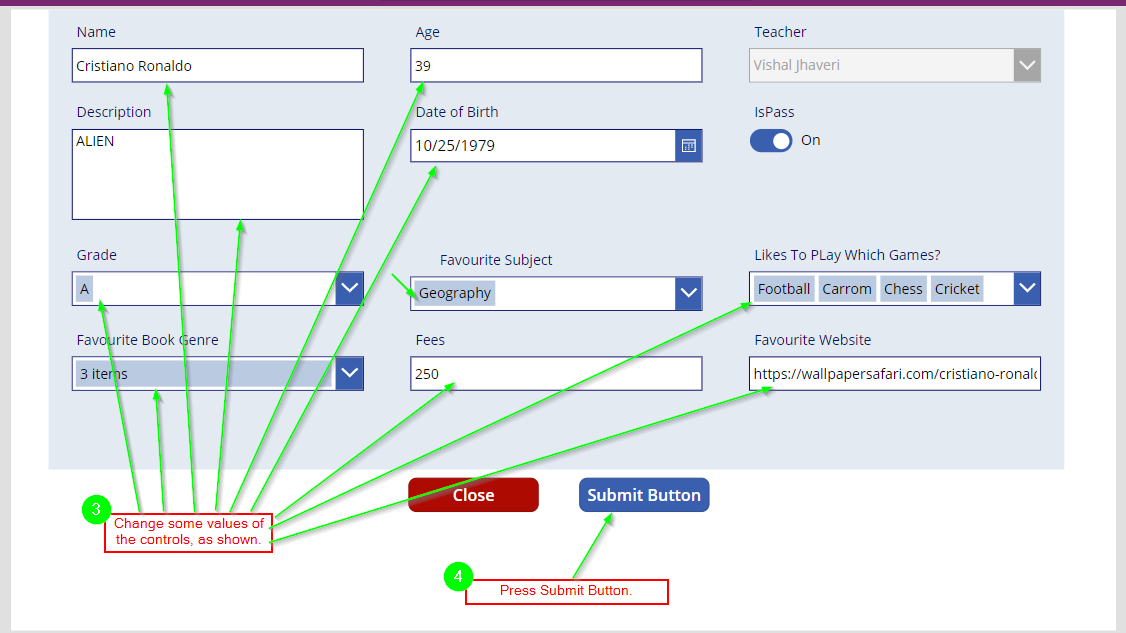
- On press of Submit button, you will be navigated to “scr_View” where you can view the edited record’s values.
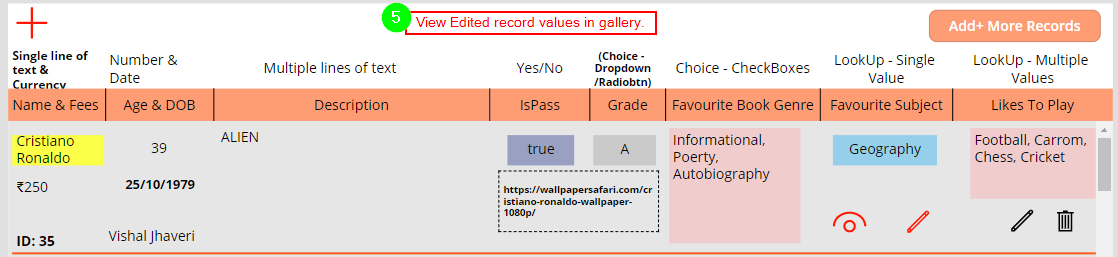
View Existing Records:
- Press Eye icon of “scr_View”. You will be navigated to “DetailsScreen”
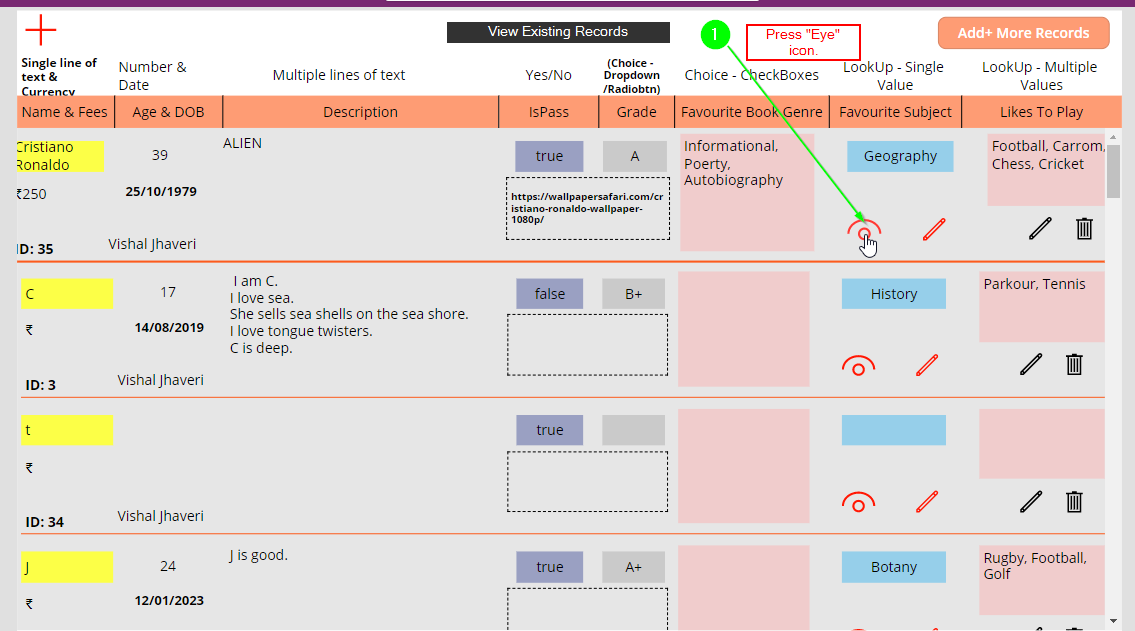
- View the record details in “DetailsScreen”. You cannot edit values in this screen.
 On pressing Close button, you will be navigated back to “scr_View”Note: Deleting any record from a data source is the same as the shown in Patch form. i.e., “Remove(list_PatchingFromPowerApps, ThisItem)”CONCLUSION:In this blog, we demonstrated how to perform CRUD operations in any data source using Forms in Power Apps. Using Forms is quick if the requirements are basically performing CRUD without any custom-built logic. On the other hand, using Forms limits us from designing aspect plus it also restricts the users to save the custom values in any column, and it has a monotonous design.
ATM Inspection PowerApp to ease ATM inspection and report generation process.
https://www.inkeysolutions.com/microsoft-power-platform/power-app/atm-inspectionInsert data into Many-to-Many relationship in Dynamics CRM very easily & quickly, using the Drag and drop listbox.
http://www.inkeysolutions.com/what-we-do/dynamicscrmaddons/drag-and-drop-listboxComply your Lead, Contact, and User entities of D365 CRM with GDPR compliance using the GDPR add-on.
https://www.inkeysolutions.com/microsoft-dynamics-365/dynamicscrmaddons/gdprCreate a personal / system view in Dynamics CRM with all the fields on the form/s which you select for a particular entity using the View Creator.
http://www.inkeysolutions.com/what-we-do/dynamicscrmaddons/view-creator