
Steps to move existing Legacy(Classic Interface) to UCI(Unified Client Interface) in Microsoft Dynamics 365
WebSiteAdmin, February 14, 20207125 Views
As of September 2019, Microsoft has announced that the legacy web client is deprecated. Customers must transition to Unified Interface before October 1, 2020. Microsoft will continue to provide support, security and other critical updates to the legacy web client until October 1, 2020, but won’t release any additional functionality beyond what has already been announced.
For more information please read below:
https://docs.microsoft.com/en-us/power-platform/important-changes-coming#legacy-web-client-is-deprecated
Please know, the new CRM instances are created in UCI(Unified Client Interface) itself. We cannot create a classic interface.
To move the entire CRM instance(Environment-wise) to Unified Client Interface:
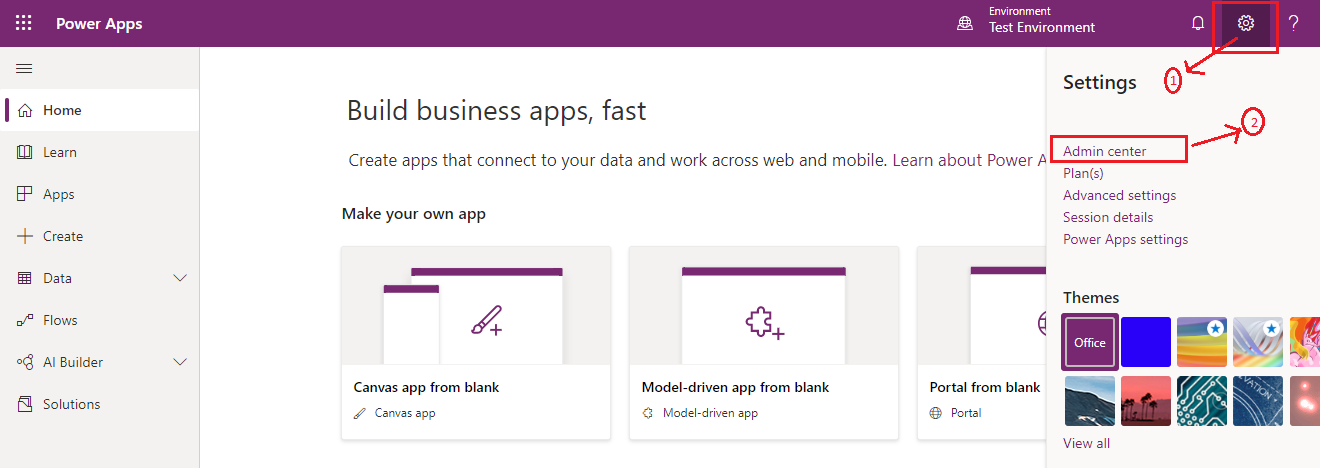
- Open PowerApps interface: https://web.powerapps.com
- Click on the gear icon on the top-right corner of the screen. And then, click on the ‘Admin Center’ link.
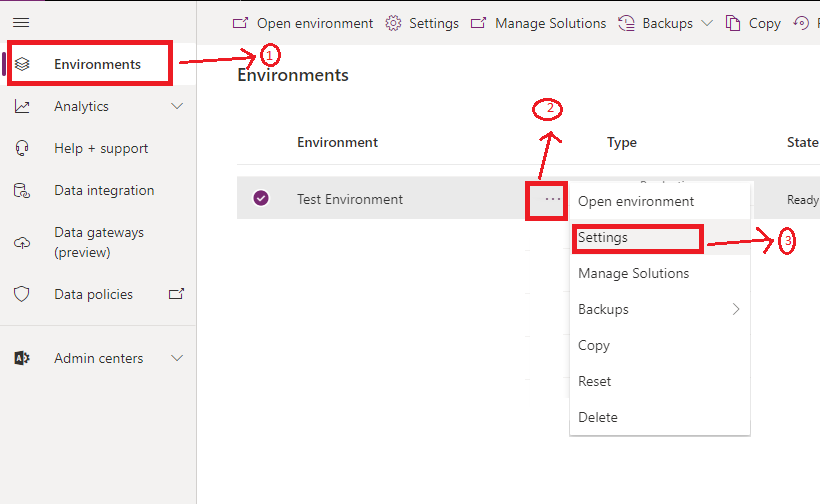
- Now, click on ‘Environments’ and then on the 3 dots besides the Environment name which you have to move from Classic to UCI. Then select ‘Settings’.
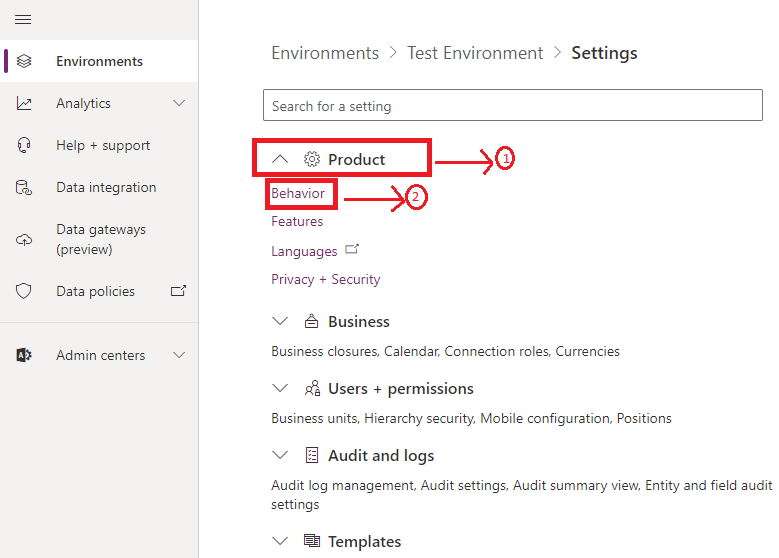
- Then, click on Product -> Behavior
- And set the ‘Use Unified Interface only’ toggle button as On.
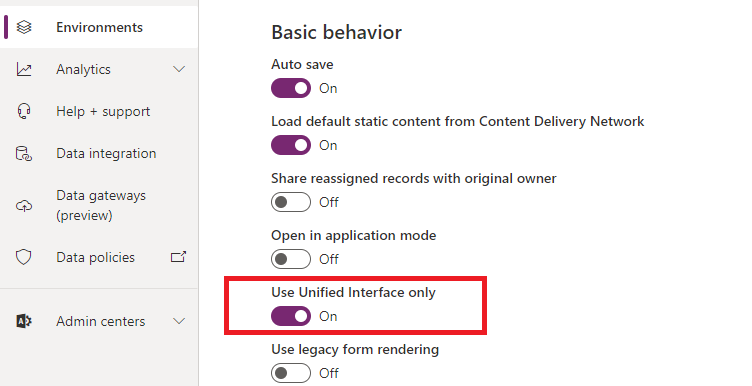
Doing this will move your CRM instances in the selected environment to UCI.
But, you might get an alert on your new UCI interface as follows:-
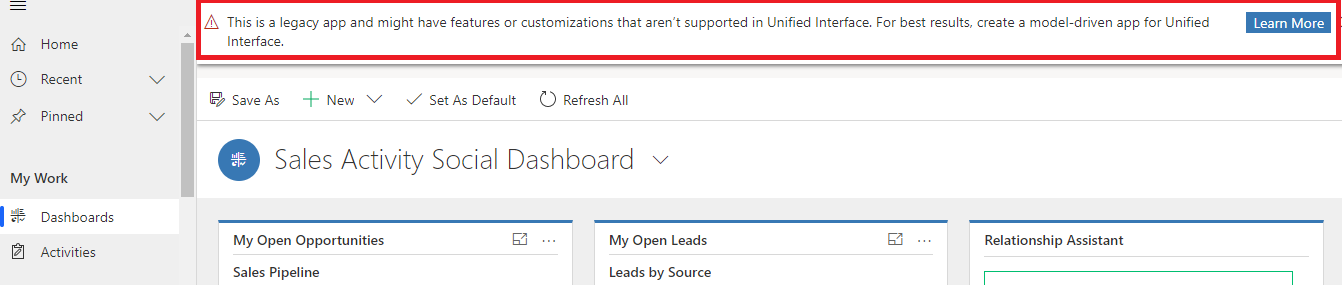
To remove this alert, follow the below steps:-
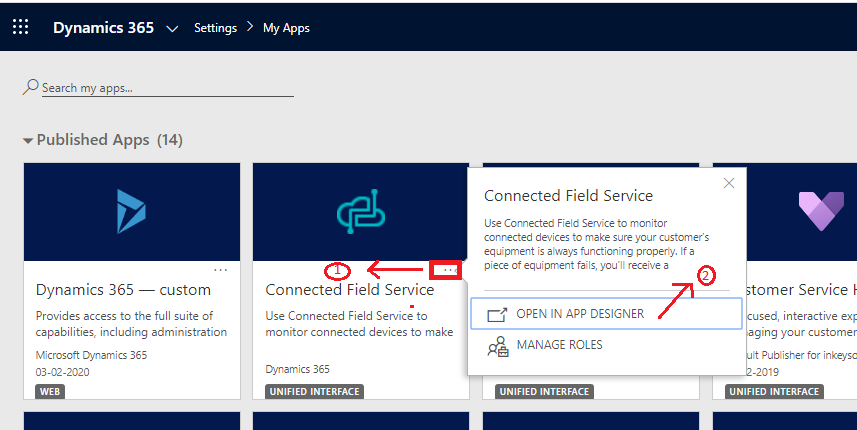
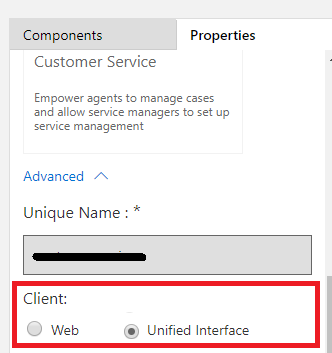
- Open the Apps in the environment in designer mode. And then select ‘Unified Interface’ as the Client in the Properties section.
To create a UCI App by copying the Legacy(Classic) App:
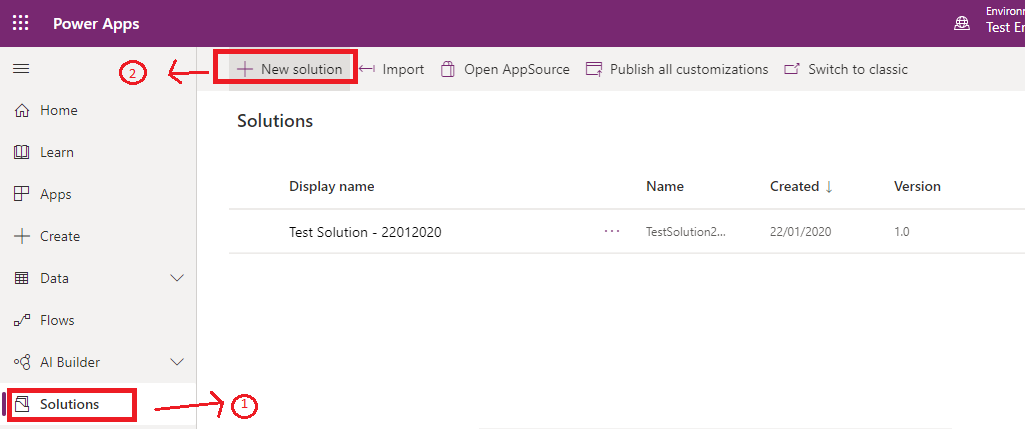
- Create a new solution from https://web.powerapps.com
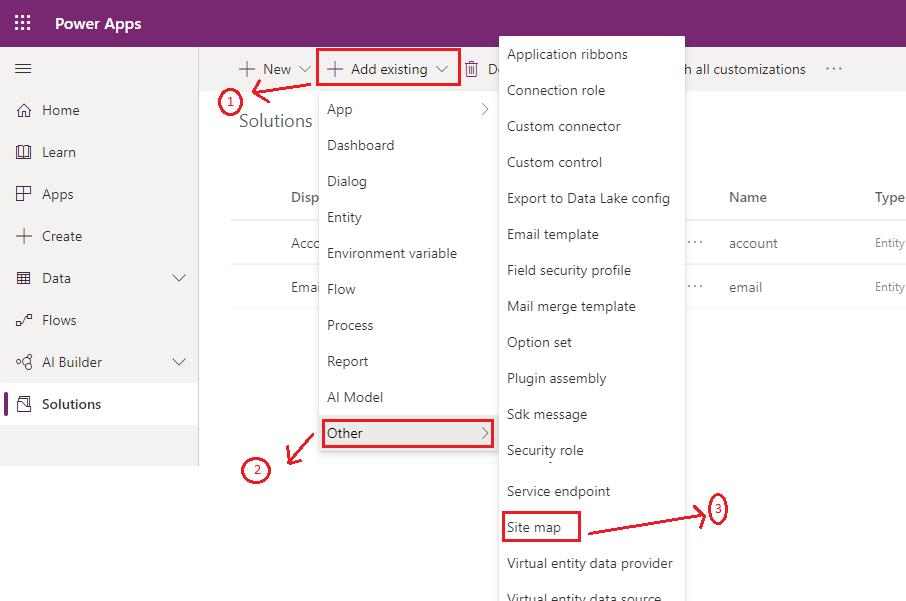
- Select the Classic App from the Add existing -> App -> Model-driven app

- Select the related Site map from Add existing -> Other -> Site map and then export the solution.
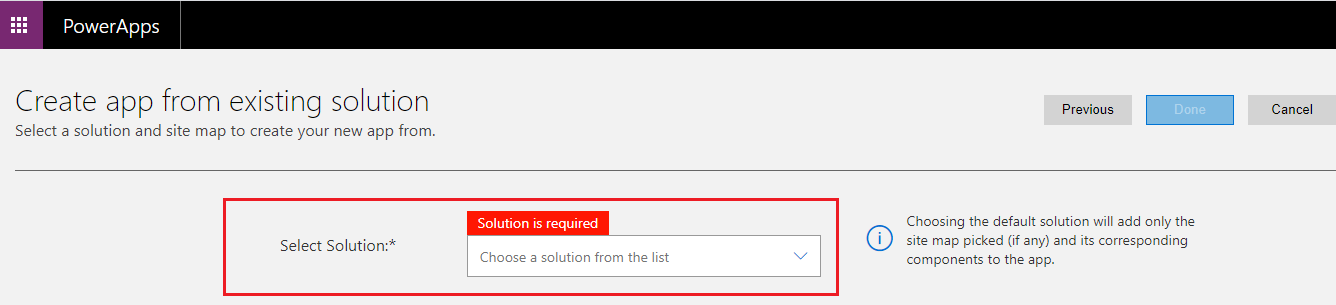
- Now, create a new UCI App using the above-exported solution. Create a new Solution and then click on New -> App -> Model-driven app
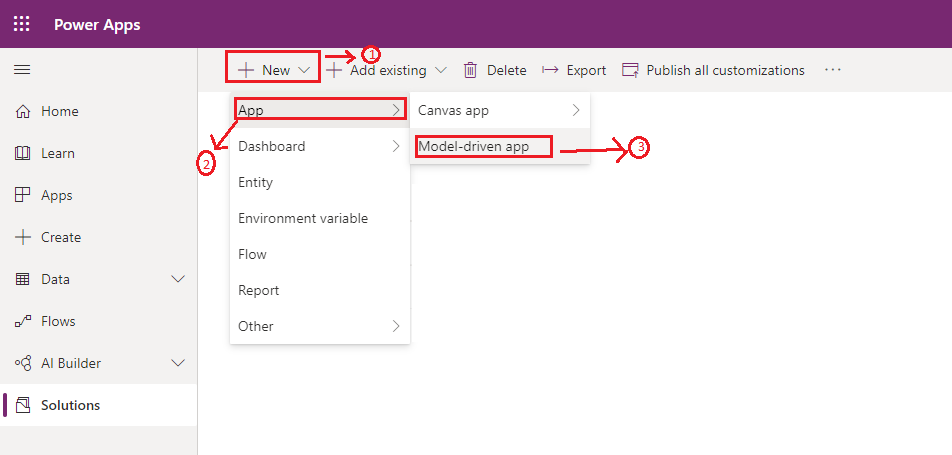
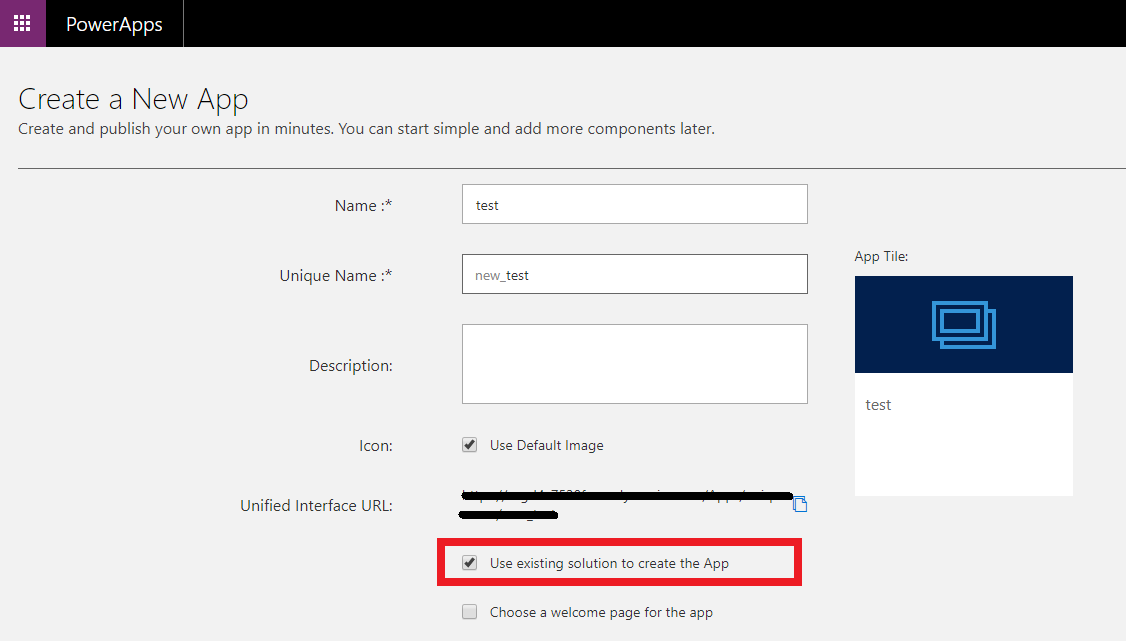
- Select the classic solution exported previously.
This way you can create a new UCI App from a Classic App.
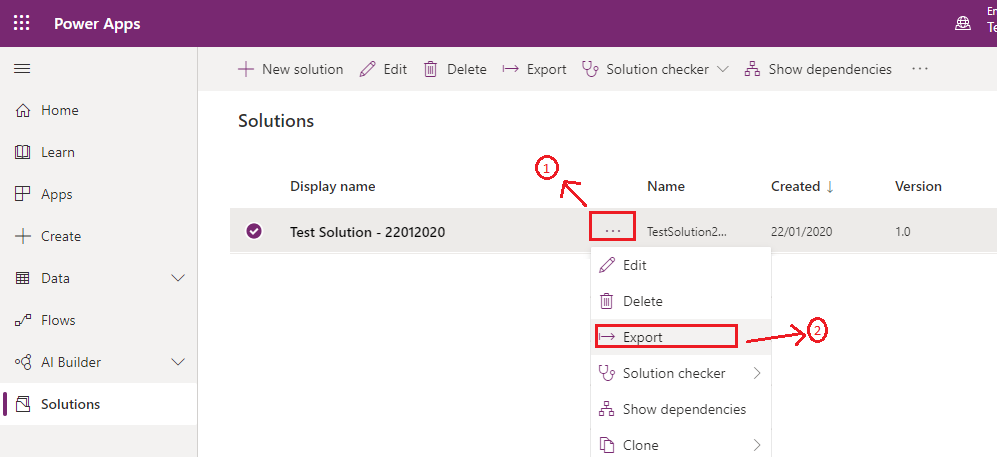
If the newly created UCI App is not having all the components same as in the classic interface then, export the newly created solution as well for the new UCI App and copy-paste the required components from the “customizations.xml” file from the zip folder of the exported classic CRM solution to the “customizations.xml” of the new UCI App solution.
I hope this helps you!!
ATM Inspection PowerApp to ease ATM inspection and report generation process.
https://powerapps.microsoft.com/en-us/partner-showcase/inkey-solutions-atm-inspection/
Insert data into Many-to-Many relationship in Dynamics CRM very easily & quickly, using the Drag and drop listbox.
http://www.inkeysolutions.com/what-we-do/dynamicscrmaddons/drag-and-drop-listbox
Comply your Lead, Contact, and User entities of D365 CRM with GDPR compliance using the GDPR add-on.
https://www.inkeysolutions.com/microsoft-dynamics-365/dynamicscrmaddons/gdpr
Create a personal / system view in Dynamics CRM with all the fields on the form/s which you select for a particular entity using the View Creator.
http://www.inkeysolutions.com/what-we-do/dynamicscrmaddons/view-creator